
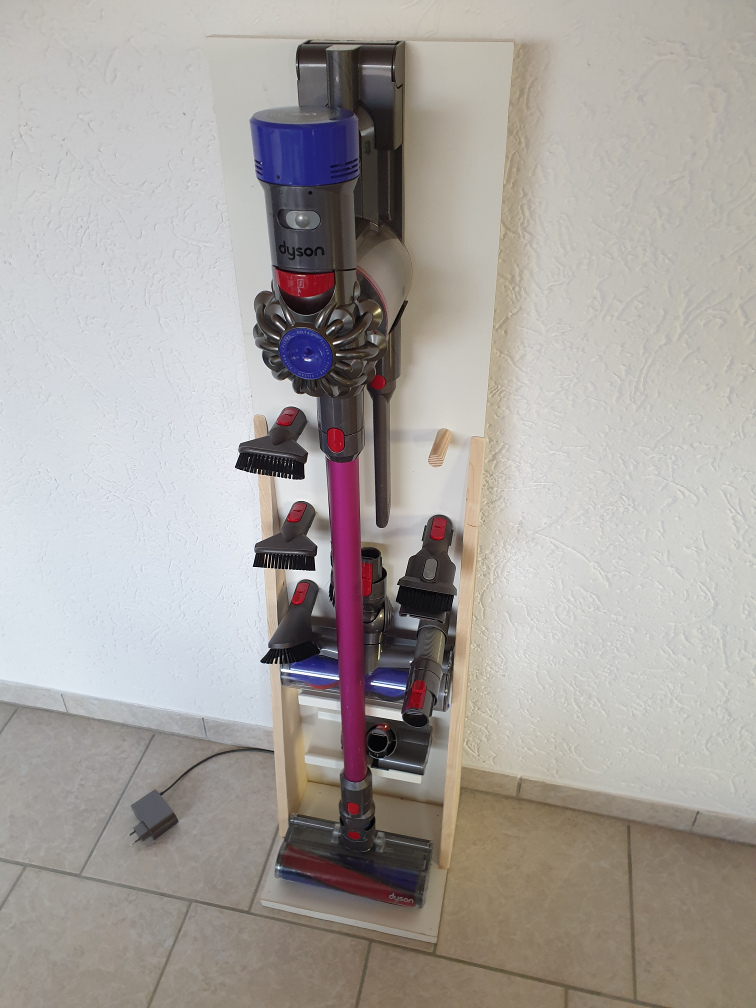
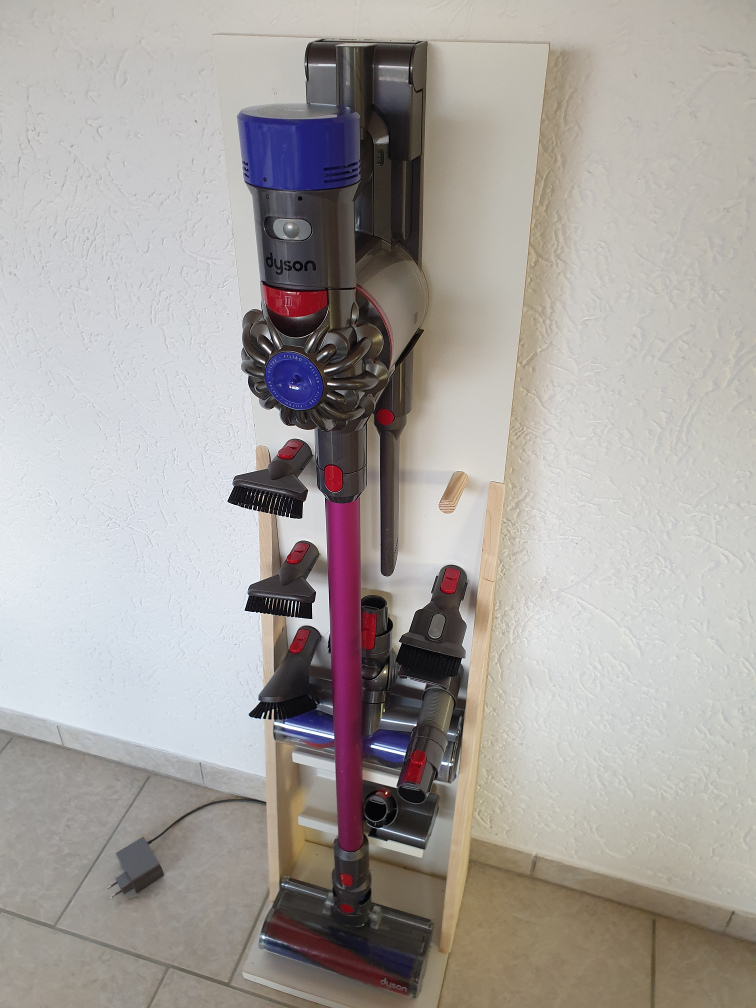
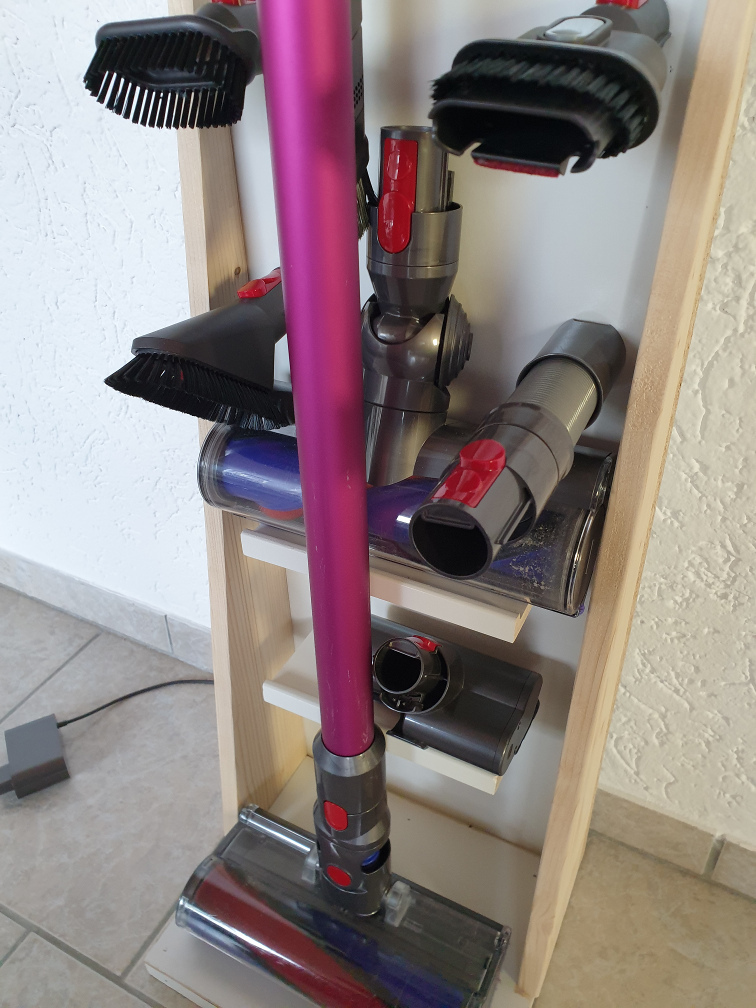
A year or two ago, our 36 Euro vacuum cleaner died. While I managed to revive it a few times with self-built filters, tape, and some rewiring, we eventually decided to abandon the zombie cleaner and go for something nicer: A Dyson handheld vacuum cleaner. We went with the V8 as it was the first one with the additional filter after the motor and a lithium-ion battery. As this was already an older model, we managed to get it used for a good price with a number of accessories from a classifieds platform. We bought some more accessories we occasionally use (Car Cleaning Kit), of course from a classifieds platform as well. However, as probably every Dyson owner knows: Storing this vacuum with its fancy charging station and all the accessories is not quite straight-forward. Even when screwing to a wall, there is still no nice way to store the accessories. In this article, I will show the stand I built from wood scraps I had lying around from another project. Here the final setup for motivation:
Requirements
I was looking along these lines:
- Must hold charging station & vacuum
- Must hold all accessories (currently 10, including 2 large, 1 small brush)
- Must offer at least two spare space for additional accessories
- Must be cheap (0.00€ is good, lower is better)
- Must take minimal effort (<1 day)
- Must not be attached to the (immovable) building
- Does not need to look pretty, as it is hidden in a storage corner or shelf anyway.
Options
Initially, I was looking at mounting the vacuum inside a wardrobe or a shelf, with additional laser cut mounts for the accessories. I have been using laser cut holders for different items before. At the time, I had access to a laser cutter and was trained to operate it myself. With acrylic it is easily possible to develop very cheap holders. All that is needed in software is something like Inkscape or a similar drawing program. Unfortunately, I currently do not have access to a laser cutter and thus needed to find an online service for this. I measured the accessories, drew up a quick design (see here and here)) and checked for 3mm transparent acrylic at Snijlab. Five holders for two accessories each would run me about 30 Euros including shipping. Not too bad of a price, but cheaper must be possible.
Of course there are a number of 3D printed holders, but I would need to order these as well (or ask friends to print). Plus, many of these don’t look very trustworthy for the heavier accessories, such as the carpet brush.
Some googling revealed that there are a number of stands up for sale in all price ranges and materials. However, none of these seemed to match my requirements, especially in terms of number of accessories. I did take some inspiration from them though, as well as other DIY stands I found online.
Dimensions & Material
The dimensions of the stand where determined by two factors: The vacuum itself, as well as the available scrap wood I had lying around. I did not make a plan that I can could share here, but rather designed as I went along.
The vacuum with charging station has a standing height of about 1.2m. Ideally, one goes slightly higher, allowing to take out the handheld vacuum from the charging station, without having to take the extension and foot.
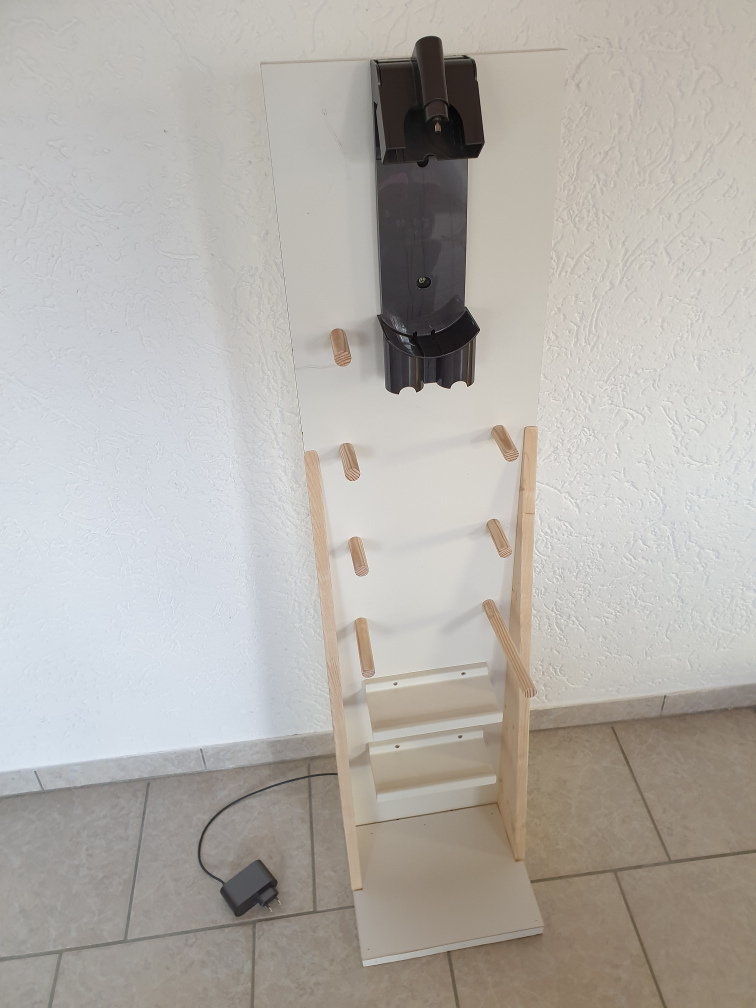
On the other hand, an old piece of wood from a shelf I had left was 1.2m high and 40cm wide. I decided to use 30cm for the width of the back plate and cut off the rest to manufacture a foot of 30cm width and about 25cm depth. If you have, I recommend to use an extra piece of wood for the foot. It just looks much nicer than assembling it yourself.
Building an L-shape stand, some support is necessary for it to not collapse when loaded (or bumped into). I used the leftover triangle pieces from the DIY Learning Tower I built a while ago. These pieces are 11.5cm deep, 80cm high and 1.8cm wide.
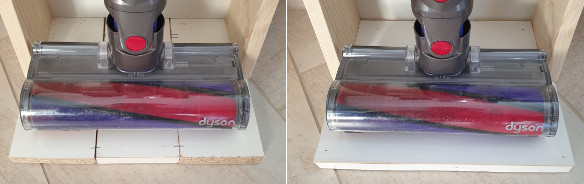
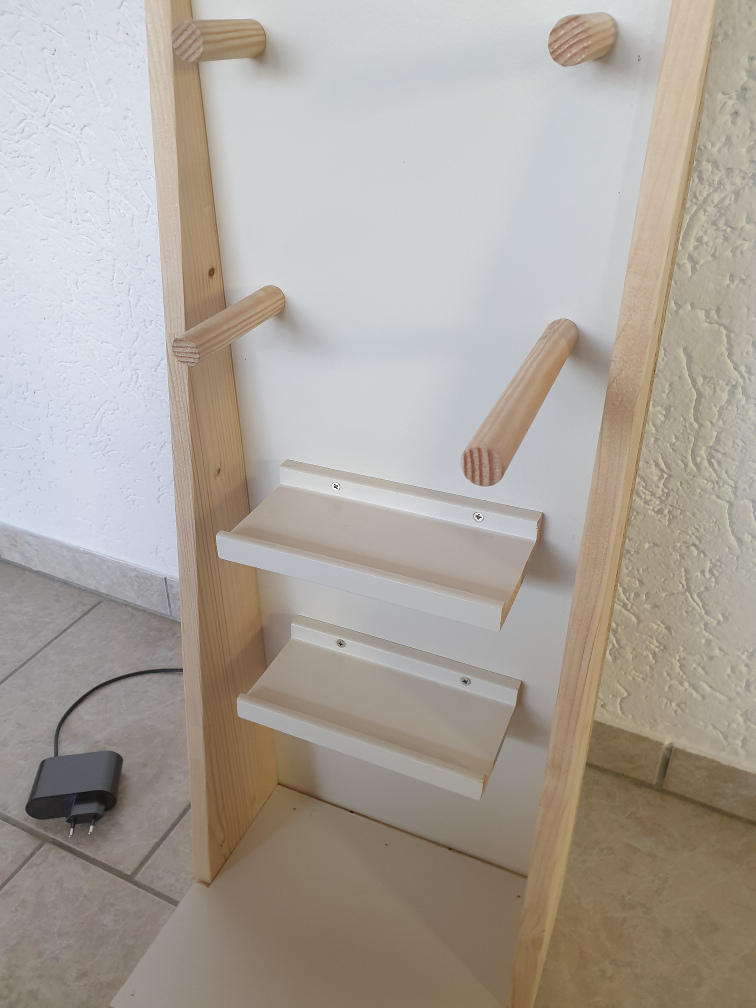
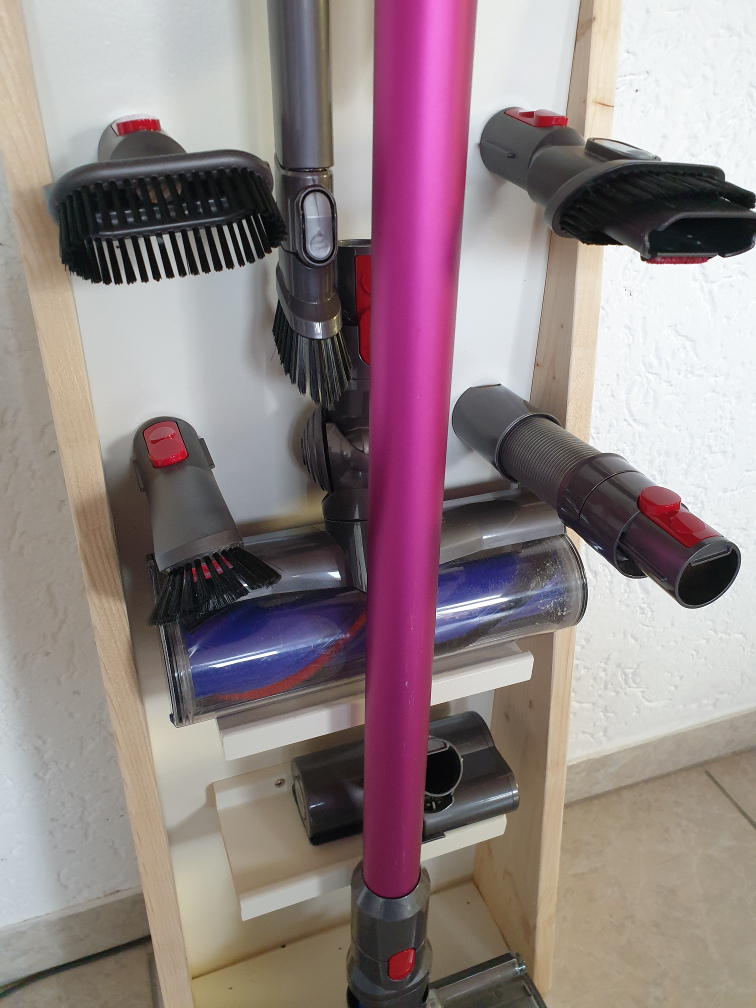
With 30cm width of the stand and the triangle supports being 1.8cm wide, I have a good 26cm left for the Dyson brush. The big brushes are 25cm wide, so this fits just nice.
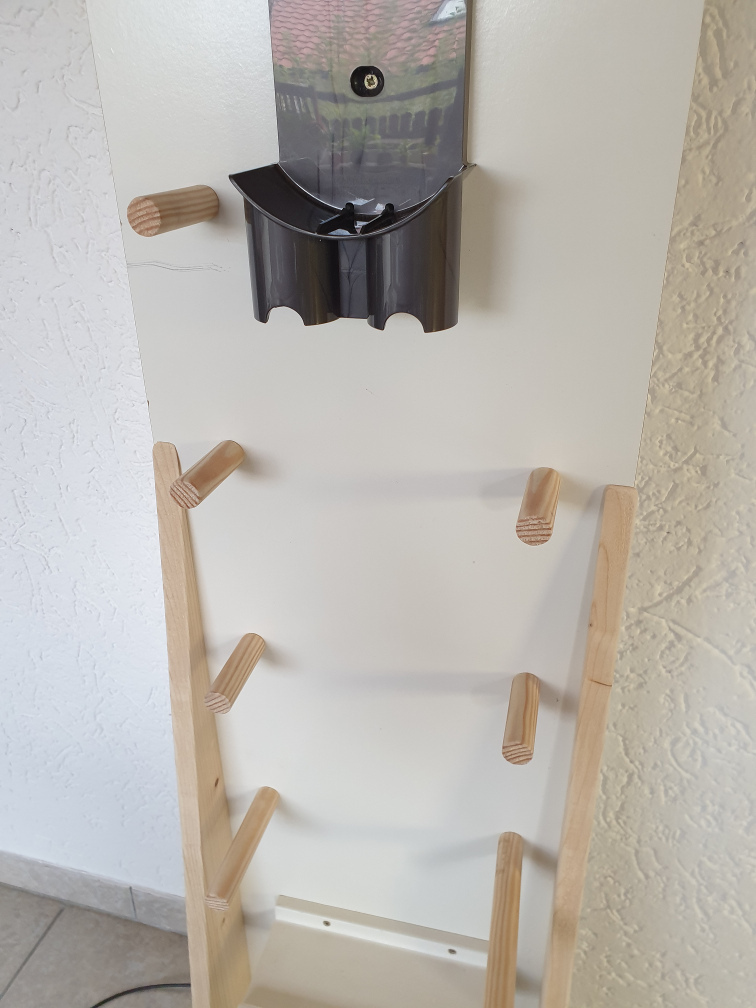
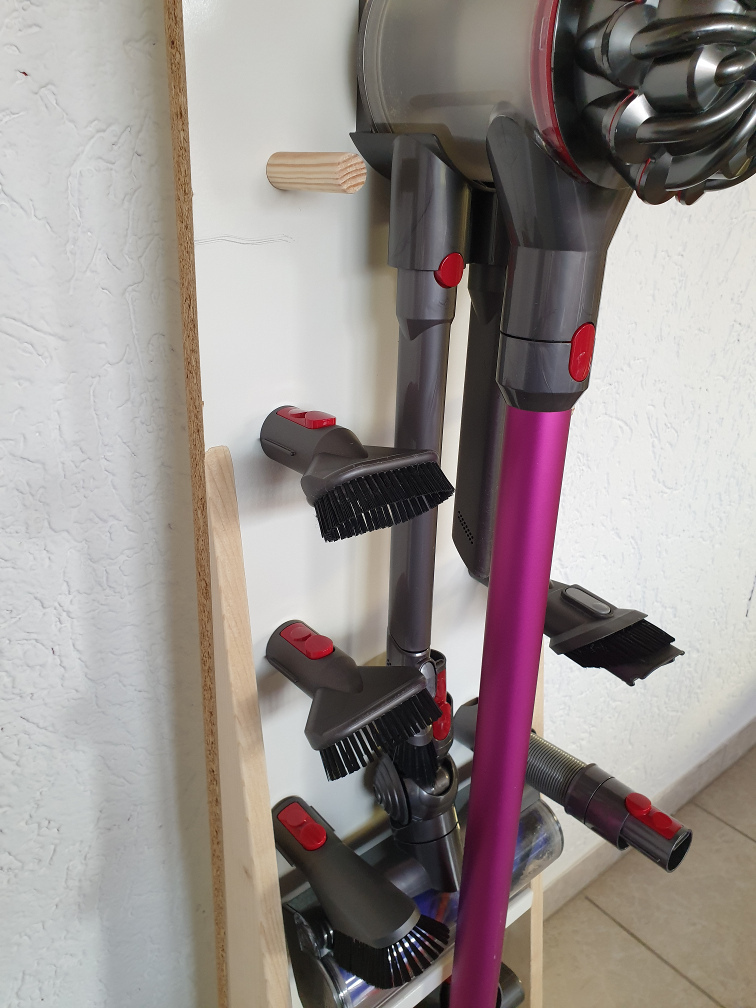
I also had half of an old Ikea wall shelf lying around that the previous tenant left in the flat and decided to incorporate that for the heavier brushes. I halved this shelf again and ended up with two pieces of 9.5cm depth and 19.5cm width. All other accessories where simply placed on wooden rods that I stick to the back plate. For this I also used the leftover from the crossbeam of the DIY Learning Tower. I cut this into different length (5x 6.5cm, 1x 9.5cm, 1x 17.5cm).
The shelves are mounted 20cm and 35cm above the foot, respectively. All other accessory holders are spaces 15cm apart vertically and about 5cm from the sides of the stand.
For screws I used whatever I had lying around (extras from furniture, bought for other projects, etc.).
After assembly, I realized that the foot does not look very nice, being assembled out of three parts and covered this with the back plate of another piece of furniture, cut to size. This material is very cheap and can be bought from almost any hardware store.
Tools
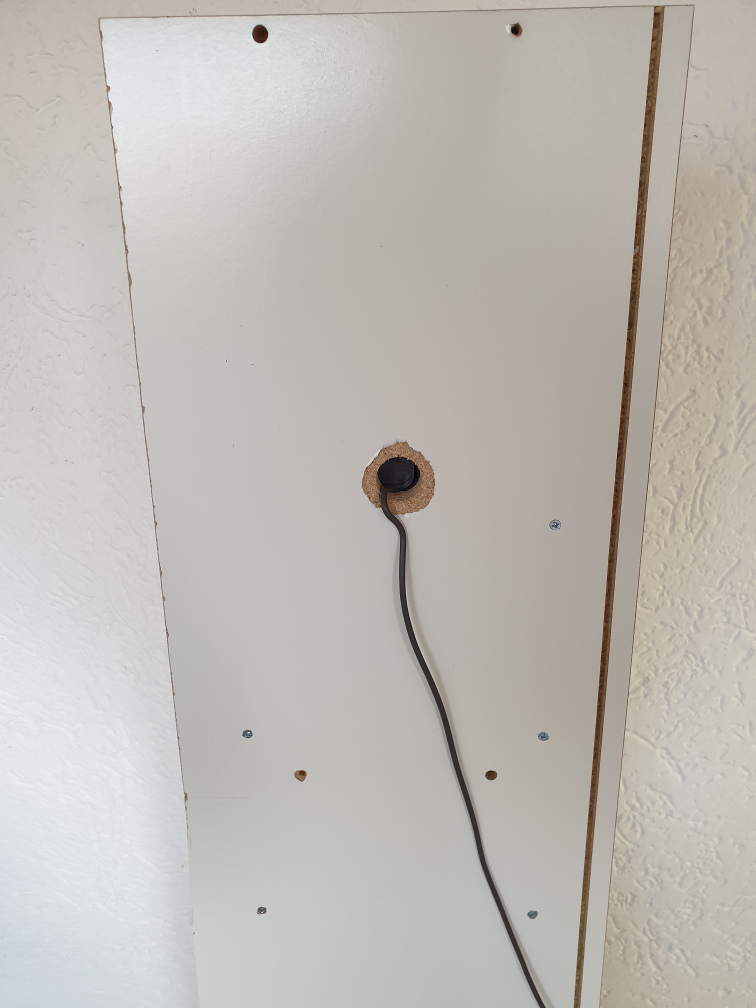
As usual, I used only very simple tools. A Bosch IXO with drill extension, as well as a pad saw is all I needed. For a nicer finish, you might want to use some grinding paper. If you want to run the charging cable through the backplate, a hole saw is helpful. I borrowed that from the neighbors. It would certainly also be possible with the pad saw, though. If you want to cover the foot in a similar manner, you might need a hammer.
Assembly
As usual, to avoid the wood to split, make sure to pre-drill all screw holes!
After cutting the pieces to the sizes described above, I first screwed the three pieces of the foot to bottom the backplate. Make sure to use two screws for each piece, if you used multiple pieces, to avoid turning. Also, when using multiple pieces, align them flush with the outside of the backplate. This might give you gaps in the center, if you did not cut perfectly (like me), but these can be covered later.
Next, mount the triangles to the foot and backplate. I used two screws on the backplate and one for the foot on each triangle. Use some screw clamps to hold the triangles in place.
This should now give you the basic outline.
I then attached to charging station to the top, allowing me to test the stability. to do so, align it flush with the top of the backplate and mark the two screw holes. If you want, you may now also drill the hole for the cable. This is optional, you can also run the cable along the front. I placed the center of the hole about 6cm from the bottom of the charging station (or: about 25cm from the top). The exact location does not matter much, as long as the hole is covered by the charging station and can be reached by the cable.
The mounted charging station also allowed me to place the accessory holders and find the dimensions stated above. I then pre-drilled the marked locations, as well as the accessory holders, and screwed in the accessory holders from the back. The shelves have screw holes and are mounted from the front, though.
This should now give you the basic stand. As mentioned above, I did not like the looks of the foot, consisting of three pieces and decided to cover that with a bit of furniture backplate (1mm MDF with white veneer). I covered both the top and also the front of the foot by nailing the material onto it with a nail gun (a simple hammer and nail will also do):
More Photos
Conclusion
Overall, I am very happy with this stand. The vacuum cleaner finally has a dedicated place, where it can be charged and stored, together with all accessories. It is certainly not the most pretty setup, but at a cost of 0,00€ and half a day of effort in building, it fulfills the requirements perfectly.