
As shown in one of my last posts, I operate a number of devices and services at home. Until now, these had been distributed across my home, wherever there was power and network available. This was not a very pleasant situation. This, I decided to build a shelf for these (and future) devices.
Requirements
I intentionally did not fix on a 19” shelf, but instead start from scratch, thinking what I would need. I wanted a shelf…
- …which is easy to move around, i.e., ideally on wheels and with few connections to the outside.
- …which is large enough to house all my components with some space to spare, but not too large to obstruct too much.
- …which is very flexible. I change my components often and want to be able to contain most of them in this shelf.
- …which is easily accessible from at least front and back.
- …with a display showing me the state of the system.
- …which is as cheap as possible.
Inspiration
Before building, I pondered what I could do. I quickly settled on the standard 19 inch rack not being very suitable for my purpose, as I have no 19 inch components and also don’t intend to buy any. Furthermore, these are rather large. While looking around for racks, I stumbled across 10 inch racks, which might have been a interesting option, however, except for one or two components, I would also just place everything on shelves or would need to build adapters. Additionally, these are not very cheap.
There are, however, a number of excellent DIY server shelves out there. In fact, too many to mention them all. Thus, here is a list of those that most influenced this build:
- Jules Yap’s DIY Server Cabinet using IKEA parts on Ikea hackers. While this is far too large, I really like the dark glas doors. This might have been what got me to get a glass door.
- Haden James’s 12u Home lab rack. Again, a rack, but very clean and with an amazing status display.
- captain_yelland’s Ikea Besta rack, especially for its cleanliness and non-rack components. I can learn a thing or two on cable management here.
I then fairly quickly settled on an Ikea base. With the proliferation of Ikea furniture, these are cheap to get used, and even if not I live a few minutes drive away from Ikea. I first intended to get started with a Kallax shelf, inspired by these two:
- Teepo8080’s Kallax rack which nicely combines rack monted components with non-rack components and additional shelving space.
- FlomoN’s 10-inch Raspberry Pi Kallax with an amazing pull-out mechanism.
However, I did not want to combine with other shelving and the available Kallax are not quite suitable for the size of the components I am looking at placing there (a potential future UPS would be too deep). Furthermore, I did not find the size suitable as standalone shelf on wheels.
Components
I thus decided to got with a Besta shelf, partially triggered by the availability of used items and the general dimensions. I managed to get a used white Besta 60x40x38cm and door for 20 Euros and an additional glass door for free in the area here. I had to buy additional hinges for the glass door (20 Euros) and a shelf (8 Euros) directly from Ikea. I also added the Bekant wheels (30 Euros), which nicely fit into the Besta feet inserts, though a bit long and expensive. I would not necessarily recommend the wheels though, as I feel smaller wheels might look better, are cheaper, and also not difficult to mount.
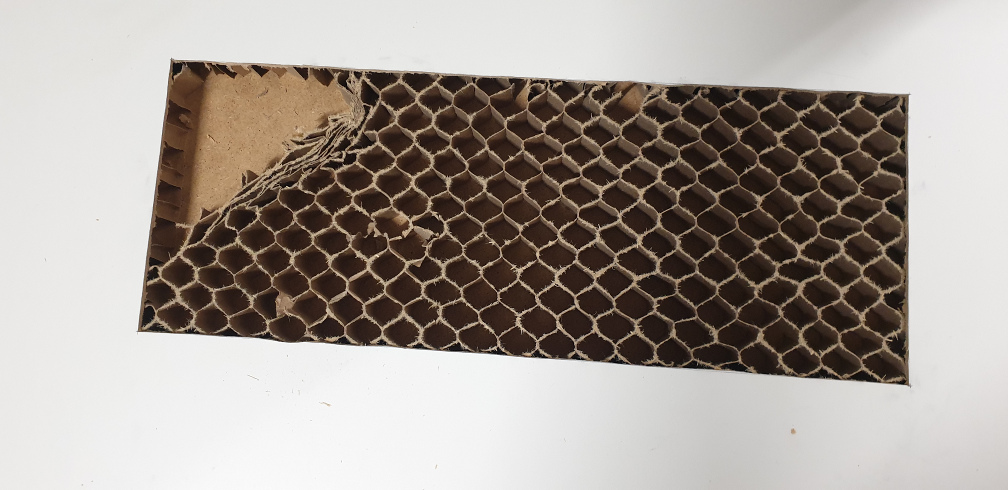
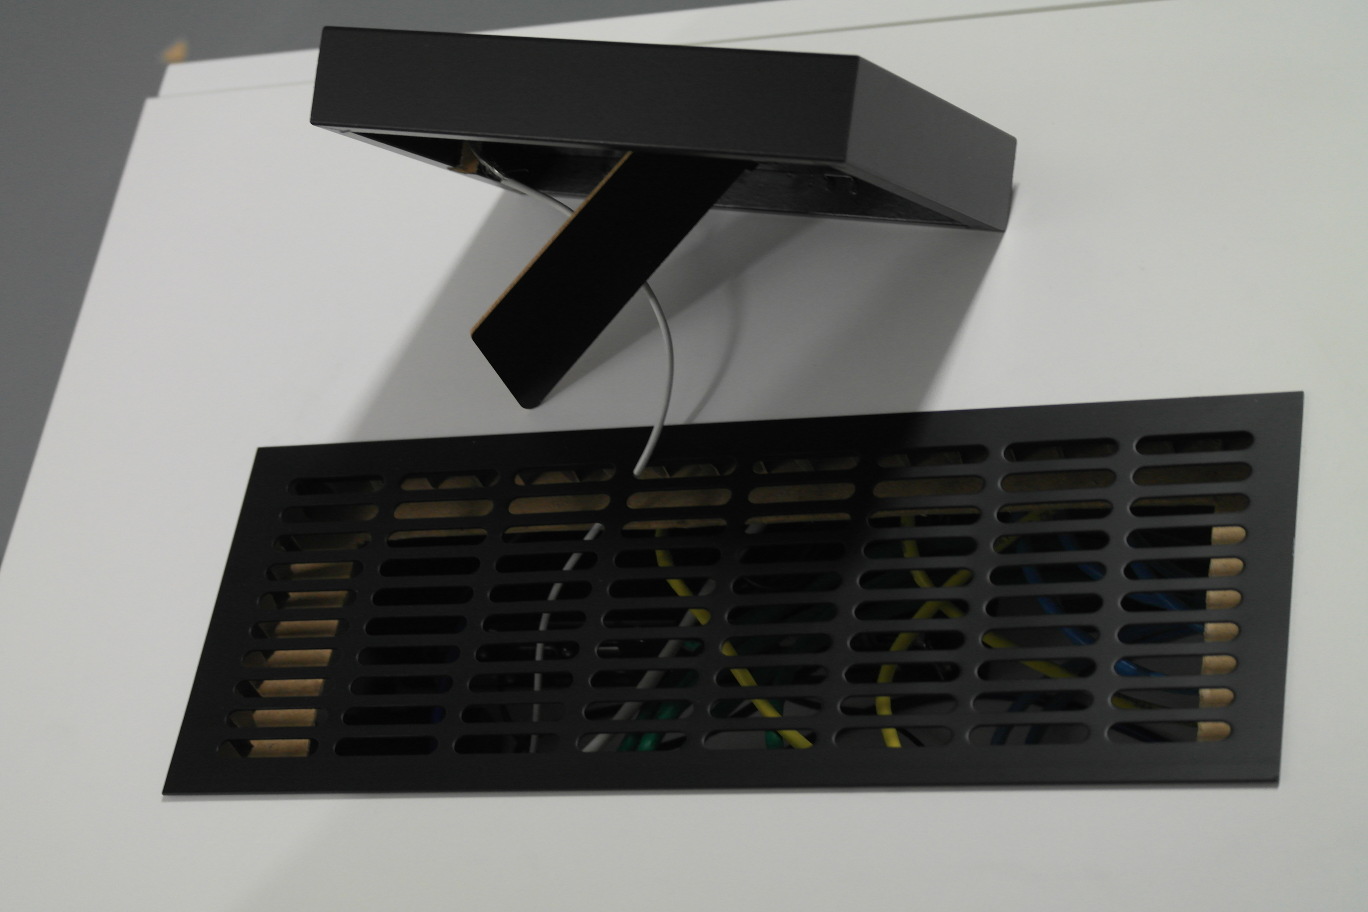
Additionally, I decided to add a simple flap for cables (similar to this) on the inside, which I got from a private seller (2 Euros) and, after some heat issues, a grille from Aliexpress (about 5 Euros).
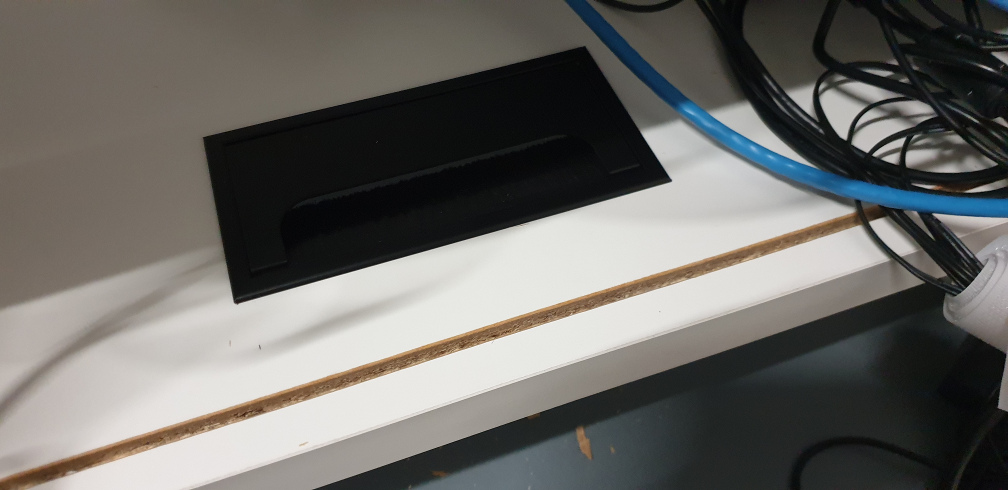
For the display, I decided to once again use a Kindle, but this time nicely place it in an Ikea Ribba 13x18cm frame (2 Euros).
Building
Since I bought the shelf used, it was already built. I did remove the back however and install the door from the front to the back side, so that the glass door could be mounted on the front. This is fairly trivial, as the Besta shelves are symmetrical and the pre-drilled holes are already available on the back.
More troublesome was the integration of cable flap and grille.
However, as Ikea furniture is mostly cardboard and pressed wood, this is also not terribly difficult: The furniture can be cut with a simple carpet knife and some strength.
When installing, make sure to avoid cutting too close to the corners of any piece of furniture, as the corners are usually strengthened by wood on the inside.
You can determine the rough size by simply knocking and comparing the sound differences.
For the display, I had to modify the Ribba frame by drilling space for the USB cable. I modified the USB cable by removing a lot of the plastic covering to make it smaller and fit the frame. Furthermore, I drilled a hole to be able to use the on/off switch of the Kindle while in the frame. I would not recommend this, as the hole is a little too visible for my taste and does not function very well. As the clamps holding the back of the frame in place are meant for pictures and not rather thick Kindles, I additionally placed new staples on the inside of the frame. These hold the Kindle in place. You may also use nails or similar here.
Gallery
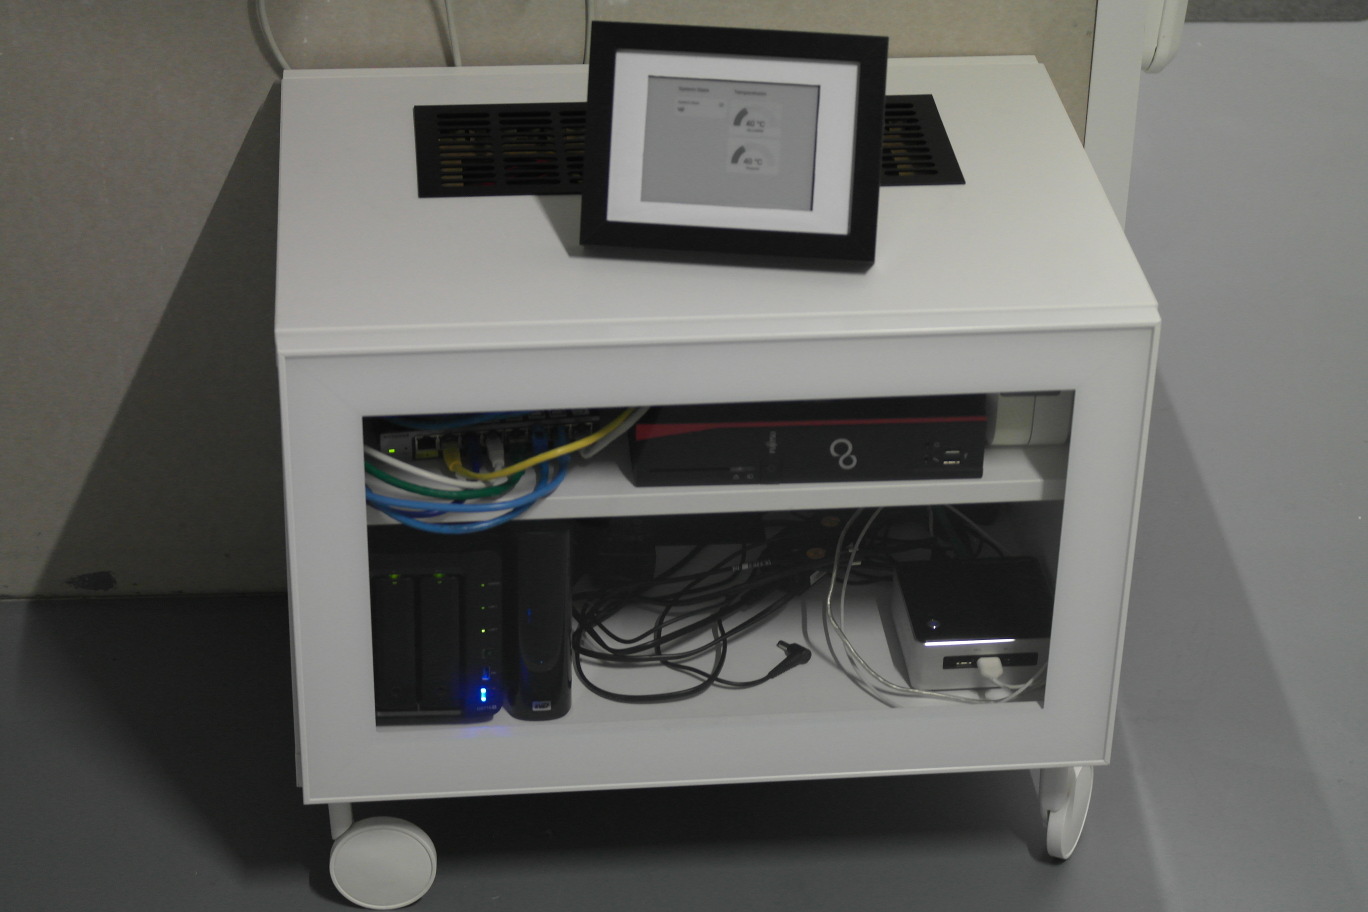 A view from the front.
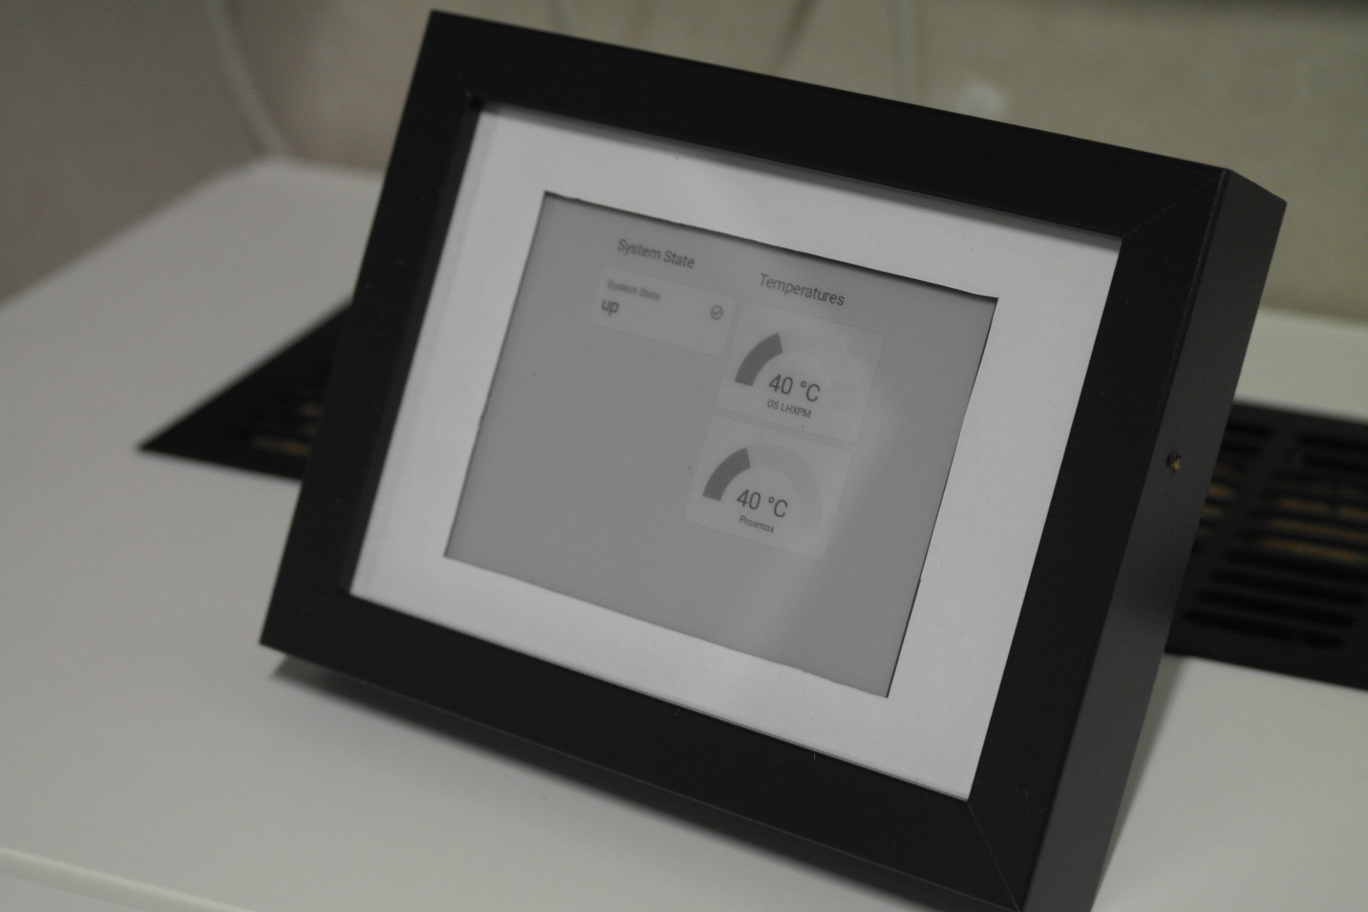 The status display, showing the system status from Uptime Kuma and the temperatures of two devices, collected via Glances and rendered in Home Assistant.
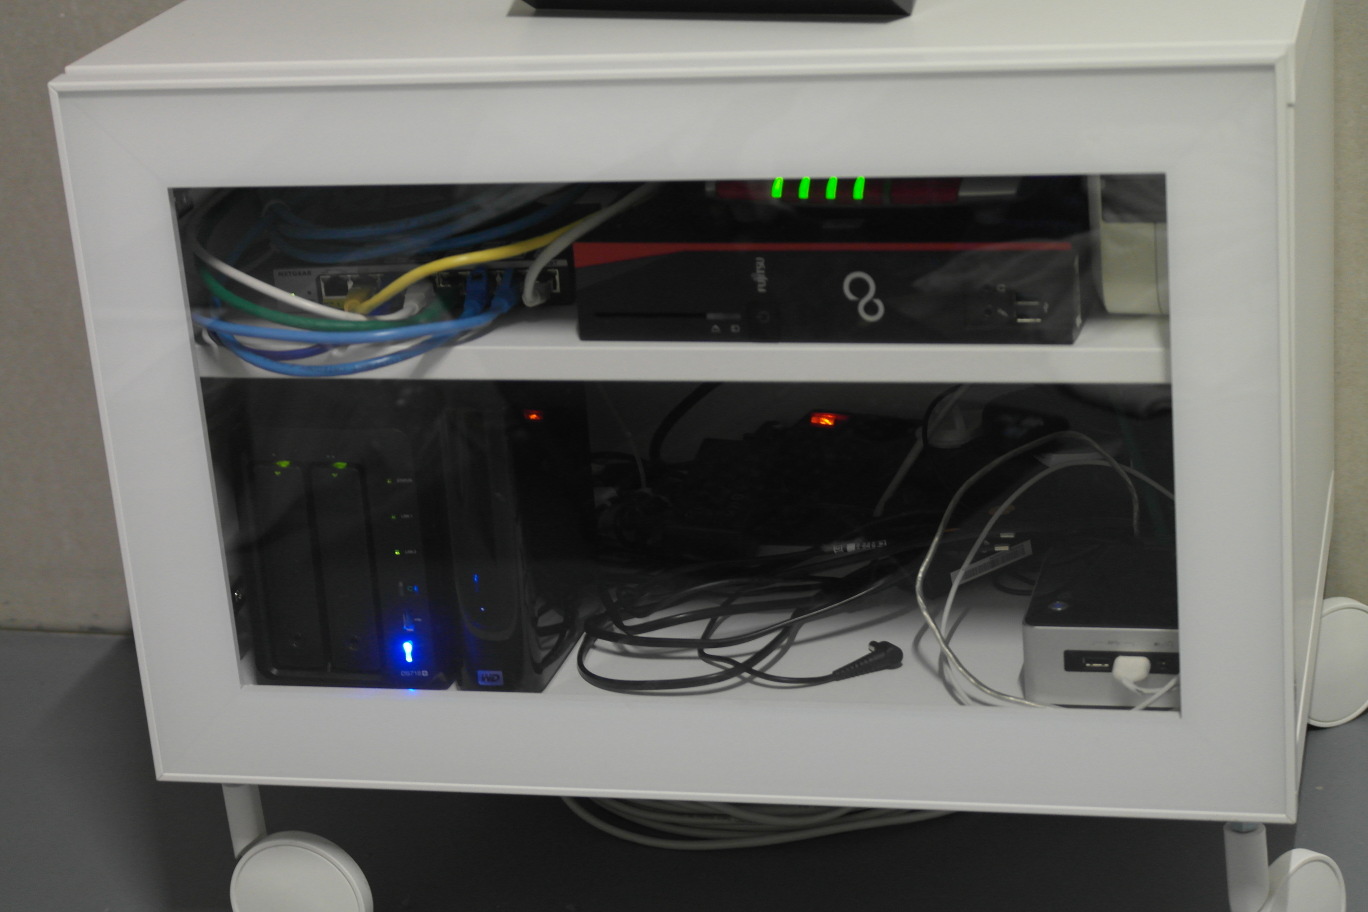 The content of the shelf: A Netgear GS108T-300PES running OpenWRT (thus no LEDs), FritzBox (current router), Fujitsu S920 (future router), Brother label printer, Synology Diskstation, Western Digital USB Drive, Intel NUC.
See Homelab Review 2023 for details.
I definitely need to improve my cable management.
The content of the shelf: A Netgear GS108T-300PES running OpenWRT (thus no LEDs), FritzBox (current router), Fujitsu S920 (future router), Brother label printer, Synology Diskstation, Western Digital USB Drive, Intel NUC.
See Homelab Review 2023 for details.
I definitely need to improve my cable management.
 After operating the shelf for a few days with closed doors, I started having network issues.
As it turns out, the older Netgear switch I was operating then did not take the temperatures very well.
There was just too little airflow.
I thus decided to add this grille for ventilation.
For now, I will keep this passive.
If required later, the grille and cutout are exactly big enough to place three 120mm fans.
This should alleviate any remaining heat issues.
After operating the shelf for a few days with closed doors, I started having network issues.
As it turns out, the older Netgear switch I was operating then did not take the temperatures very well.
There was just too little airflow.
I thus decided to add this grille for ventilation.
For now, I will keep this passive.
If required later, the grille and cutout are exactly big enough to place three 120mm fans.
This should alleviate any remaining heat issues.
 At the rear bottom, this where power and Ethernet are coming in.
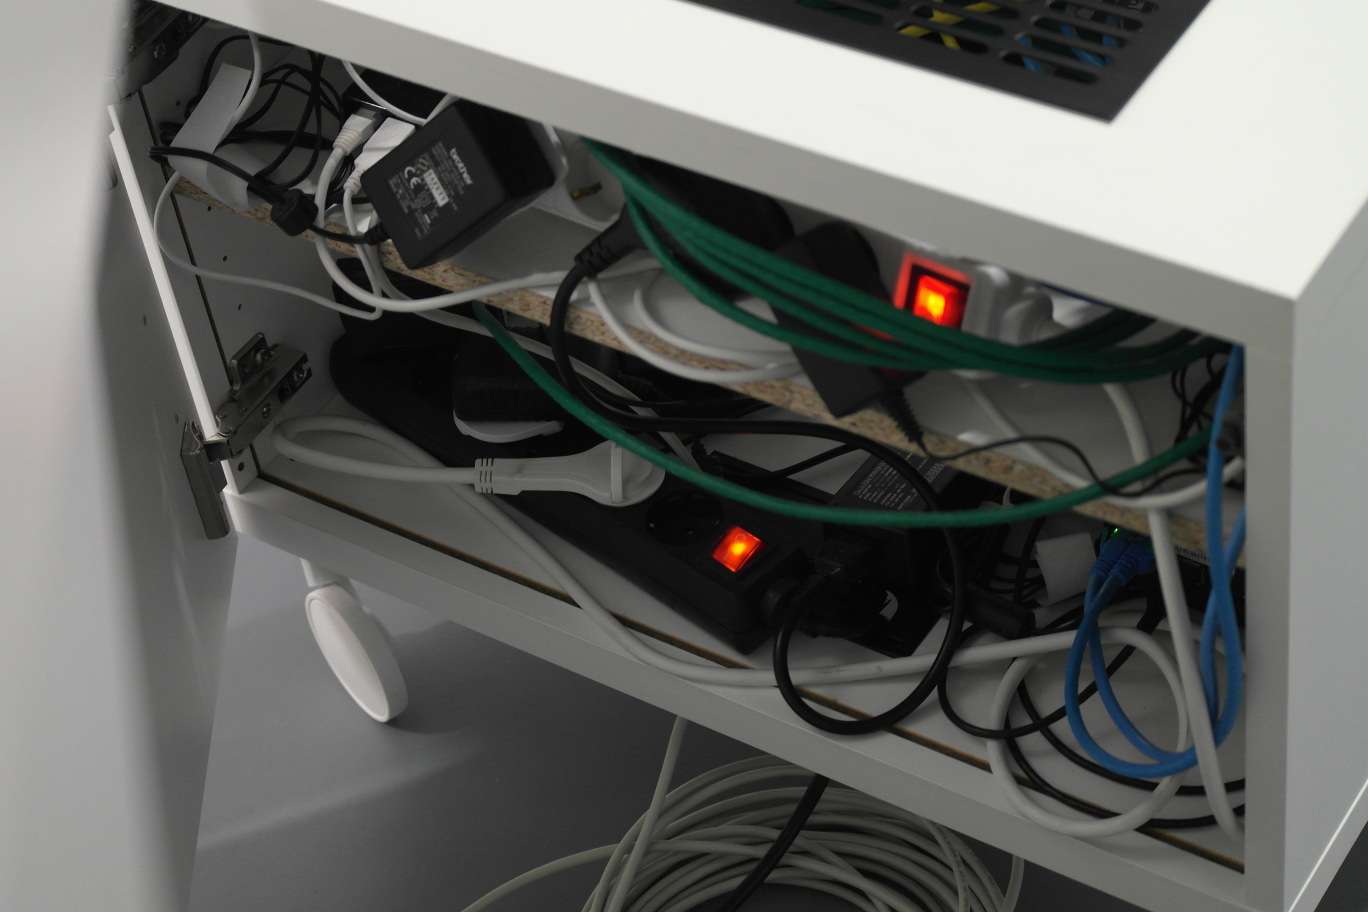 The rear door makes it easy to access cabling, especially power.
And yes, cable management is not any better at the back.
The rear door makes it easy to access cabling, especially power.
And yes, cable management is not any better at the back.
Software
Status Display
Currently, the shelf is not very smart. I use some software to get temperature measurements though. Here, I use Glances on multiple devices, which is pulled by Home Assistant. There, I have some dedicated tabs to display the status of my servers. These tabs also include information from Uptime Kuma, pulled through the Uptime Kuma HACS integration. These pages are turned into grayscale PNGs with Home Assistant Lovelace Kindle Screensaver by sibbl and served via the integrated webserver. Here is an example docker-compose for two pages:
version: "3.8"

services:
  app:
    image: sibbl/hass-lovelace-kindle-screensaver:latest
    environment:
      - HA_BASE_URL=http://homeassistant.tld
      - HA_SCREENSHOT_URL=/lovelace/servers?kiosk
      - HA_SCREENSHOT_URL_2=/lovelace/servers_mem?kiosk
      - HA_ACCESS_TOKEN=REDACTED
      - CRON_JOB=* * * * *
      - RENDERING_TIMEOUT=30000
      - RENDERING_DELAY=0
      - RENDERING_SCREEN_HEIGHT=800
      - RENDERING_SCREEN_WIDTH=600
      - GRAYSCALE_DEPTH=8
      - OUTPUT_PATH=/output/overview.png
      - OUTPUT_PATH_2=/output/memory.png
      - LANGUAGE=en
      - ROTATION=90
      - SCALING=1
    ports:
      - 44466:5000
    restart: unless-stopped
    volumes:
      - /data_dir/ha_screenshot/output/:/output
I the run a small shell script on my jailbroken Kindle (/mnt/us/status_display/run.sh):
{
mntroot rw
lipc-set-prop com.lab126.powerd preventScreenSaver 1
lipc-set-prop com.lab126.pillow disableEnablePillow disable

while true
do
	rm overview.png
	if wget http://192.168.1.123:44466/1 -O overview.png; then
		eips -c
		eips -g overview.png
		sleep 60
	else
		eips -c
	fi
	rm memory.png
	if wget http://192.168.1.123:44466/2 -O memory.png; then
		eips -c
		eips -g memory.png
		sleep 60
	else
		eips -c
	fi
done
} | tee > log.log 2>&1
which I start automatically (/etc/upstart/status.conf):
#kate: syntax bash;
description "Status display"

start on started poll_daemons and started kb and started pillow and started acxmgrd and started cmd and started lab126 and started audio

script
	su root -c /mnt/us/status_display/run.sh
	return 0
end script

post-stop script
	return 0
end script
VLANs
I did not manage to move all components into this shelf. We have a DSL internet connection, which is terminated at a telco-controlled FritzBox and some Cat 7 wiring in the house. The FritzBox, as well as a switch for the Cat 7 wiring and the Ethernet connection to my smartmeter read-out, remain external. To avoid having to run too many (i.e., two) Ethernet wires to my new homelab shelf (one for internet & for home network), I introduced VLANs. One VLAN is operating between the telco-controlled FritzBox and my FritzBox and the other VLAN is covering the rest of my internal network. Both the GS108E outside the shelf, as well as the GS108T inside the shelf support VLANs. I trunk the VLANs across the connection between the two switches, thus only requiring one Ethernet cable running to the shelf.
Note that this is not ideal, as of course the bandwidth is now shared. This means, that I can’t saturate my internet connection and the connection to e.g., my DiskStation from within the home, as the sum would be above just above 1 GBit/s. This situation happens rarely to never, so I can live with this compromise. The alternative would have been a few hundred Euros of additional spending for 2.5 GBit/s switches with VLAN support. I was not willing to shell out this amount of money for a seldom, minor inconvenience. This is a potential point to upgrade in the not too distant future, though.
I was for a short amount of time considering to also use Powerline Communication to get rid of the last Ethernet cable, but decided against it. The data rates and stability of the devices seems to be insufficient for the backbone of my IT infrastructure.
Conclusion
This project was a lot of fun and adds quite a bit of value to my homelab. I now have some proper storage, which is flexible enough for frequent adaptions. While not quite as standardized (and thus clean) as many 19 or 10 inch racks, it does fairly neatly pack all components into an easily movable, accessible, yet smallish rack.
Improvements
Of course, this is not perfect, there are always improvements possible:
- At the top of the list is cable management. The downside of having all components neatly stored in a box is the lack of cable chaos visibility, leading me to push this out further and further into the future.
- The passepartout of the status display is quickly handmade, and it shows. I might order a proper made to measure one here.
- Once there are additional components, heat might be an issue again. In that case, I intend to install up to three 120mm fans under the top grille.
- The fans might also take care of the rather unsightly view into the shelf from the top. The grille allows a lot more view (and thus also dust) into the shelf than I had expected and I might cover this a little more.
- I don’t quite like the way the USB cable of the Kindle is currently running through the grille and might add an additional hole for cables at the top. This would also allow to easily access e.g., cabled Ethernet or power when sitting at the shelf debugging.
- I might need to add a few brackets for stability. With the rear wall exchanged for a door, the shelf is not very stable and leans slightly left or right, especially when the heavy glass door shifts the cener of gravity. This should be easily resolvable with a few angle brackets on the inside.
- Some fixed mounted power outlets inside would be nice. I may or may not add them later on.
- To judge temperature a little better, I might install one or two temperature sensors in the shelf.
- Additionally, I might add a door opening sensor, as the kids play area is not very far from the shelf.
- At some point, I might shorten the threads of the wheels, as they anyway don’t screw in fully, but this is really at the bottom of the list.