
I have recently come to know the concept of a “learning tower”. This is a slightly more stable stepladder for toddlers to reach the counter top in the kitchen or the sink, long before they have the height to do so. With my son always requiring a lot of attention and wanting to be involved, I thought that would be just right for him. When I started looking up the prices of these, I was quite surprised: Apparently something so simple can turn out very expensive. I guess it always depends what the target group is willing to pay. A second though led me to Ikea and, after discovering there is nothing suitable available, to Ikea hackers. One of the most common DIY learning towers you find out there is constructed by bolting the Ikea Bekväm ladder and Oddvar stool together. At the time of this writing this comes up to some 36 Euros material cost (plus screws) and ends in a construction which is likely not very stable, not looking nicely. After searching for a little while longer, I stumbled on this post which is still based on the Ikea ladder, but adds a custom frame on top. This already looks much better. However, when already going custom, I thought I might just go all the way and built a fully custom learning tower. That kept me busy for the day. I think the final result looks great and for one day work at less than 19 Euros (plus screws) material cost, this is a real bargain.
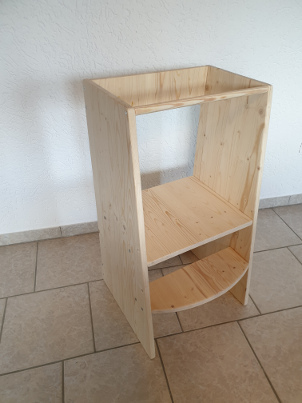
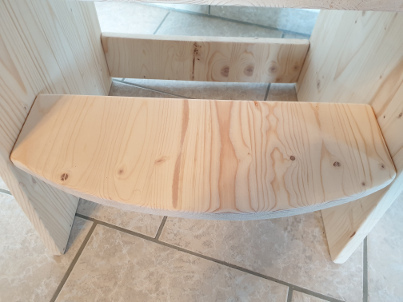
Here you can see the final product:

Design
To be very honest, I did not make a proper design or plan how to tackle this project. It seemed simple enough to just “wing it”. Turned out to be true. Some simple measurements should be taken before, of course:
- Our kitchen counter is 92cm high
- Our sink is 80cm high Since the learning tower should be usable with both, I decided to go no higher than 80cm.
For the standing surface, I was looking into about 40cm width and (up to) 40cm depth. This seemed like a big enough surface for my son to move around, but keeping the learning tower small enough for storing away when not in use.
Material
Next up was getting material. The above dimensions allowed some leeway so I was sure to find some cheap wood at the local hardware store that I can work with. What I did not expect was to find panels of almost perfect size: 80cm by 40cm. I decided to go with spruce. This is certainly not the most long-lasting wood, especially when used in kitchen and bathroom, but it seemed reasonable, not knowing how much it would actually be used. While higher quality beech wold have been available, this would have tripled the cost. Additionally, spruce is an insanely soft wood, making it very easy to work with (manual) tools. I bought three panels of 80cm by 40cm spruce, 18mm thick. One panel for each side and one panel for the other parts. Additionally, I got a round about 2cm diameter pole of spruce for avoiding head-on-corner collisions when climbing in/out.
Tools
I live in a small rental flat without the option of a large workshop and I also don’t have the budget for such things. I thus went with some simple tools that I collected over the years:
- Jigsaw: Bought that off eBay for 5 Euros some time ago, quality accordingly.
- Screwdriver & “Drill”: I have a small Bosch Ixo with drill extension. This is good enough for this purpose.
- Sandpaper (60, 120) & block: Yes, you could use a grinder, but some muscle is good enough with spruce.
- Level: To make sure standing surface is level.
Measuring, Cutting & Sanding
Since I did not have much of a plan, also here, I had to improvise. I wanted to cut of the side pieces slightly for easier access and looks. I simple drew and angle that I liked onto one of the spruce panels and after some trying, copied the final angle to the other panel. You can be creative here, just make sure that the center part still leaves enough room for the standing area. In my case, I had to shorten to a depth of 34cm, due to the shorter side panels.
The standing surface is 40cm by 34cm in my case, but also here, some leeway is possible.
The rear crossbeams are 10cm high and obviously also 40cm wide.
For the step, I felt that a straight step was just too small, since it is mostly hidden under the standing surface. I thus decided to give it some curvature. I used a simple rope and pen to draw a circle on the wood. Be careful: Make sure that the two ends have the same length. The rope might flex a little and you might end up with an uneven step. This will look ugly. If unsure, you can of course also always go with a straight step. In fact, our son barely ever uses the step.
Last, but not least, for the front crossbeam, we will use the spruce pole and cut off a piece of 40cm length.
After cutting, you should have 7 pieces:
- 2 side panels: 80cm high, 40cm wide at the bottom, angled as you like
- 1 standing surface: 40cm wide, 30-40cm deep
- 2 crossbeams rear: 10cm high, 40cm wide
- 1 step: 40cm wide, 20-25cm deep (potentially rounded)
- 1 crossbeam front: 40cm wide, round
Now comes the worst part of it all: You don’t want your kid to get splinters, so you will need to sand. If you do this manually, plan some time. For me, this took most of the day. First, I sanded every corner round and removed stains, prints, glue, scratches, etc. from all surfaces with the number 60 sandpaper. Then I smoothed all surfaces with the 120 sandpaper. If you want to go really smooth, you can of course also take a larger number to get a very nice finish. For me, 120 was sufficient.
Assembly
I first added the crossbeams (two rear, one front) to one of the side pieces. Again, I improvised here and simply put them where I felt right. Make sure the top two (front, rear) are flush with the corners though for a nice look. I then marked and pre-drilled the holes for screws on both side panel and crossbeams. When fixing them with screws, make sure the pre-drilled holes are large enough and don’t use too large screws. Since I only had some large screws available, I had to drill very carefully to not crack the soft wood. Also, you want to use screws with countersinking heads. It just looks better and you won’t get stuck later cooking next to it. Then I place the second side panel on top in the same manner. Make sure to get someone to support you to hold the side panel in place. The kid you build this for will be very happy to help!
Next, I added the step. Make sure to align that properly with the front side of the chair, especially when using a rounded step. It just looks neater. I mounted to step roughly 20cm from the bottom, since I expected to have the standing surface at 40cm height.
Last, but not least, we need to install the standing surface. To do so, stand the almost completed learning tower upright and on an even surface. While you could somewhat improvise all of the other steps, this mounting step is essential to reach a stable result. So take your time! If all screws are tightened, you should be able to slide the standing surface in between the side panels with a bit of force. If this does not work, try to sand down the sides of the standing surface a little more. Slide it at about the level you think your kid needs to reach the counter. For me, I went with about 40cm height. This is of course flexible and can also be adjusted later on (a big advantage over many off-the-shelf solutions). Next, make sure that the standing surface is level, as is the learning tower. It should all stand stable. If you are happy with the position, drill some holes through the side panels straight into the standing surface and fix in some screws. Drill all holes first and make sure the standing surface does not move, hold it in place and re-level after every hole. Then screw in place.
Congratulations! Your DIY Learning Tower is complete! For less than 20 Euros and about a day of work with extremely simple tools, I think this is a great achievement.
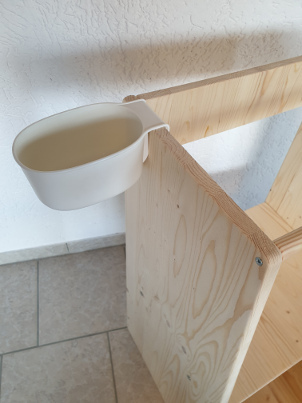
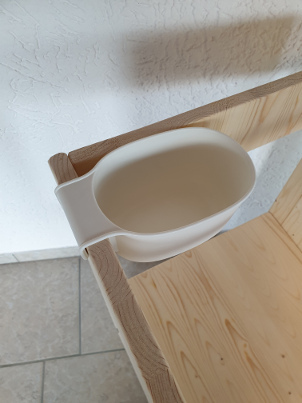
Tip: The Ikea Önsklig containers fit perfectly (e.g., for spices, supplies, as trash, …).
More Photos
Here are some more photos:
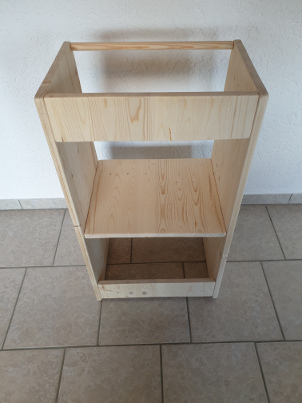
Front:

Rear:
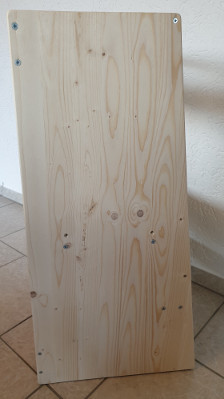
Side Panel:
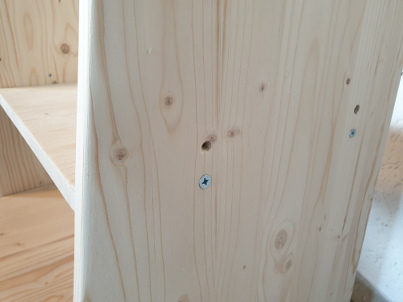
Closeup of height adjustment:
Closeup of step:
Usage of Önsklig:
Improvements
As always, better is possible:
- The wood will be very sensitive to water and humidity. You might want to consider to oil or paint all surfaces.
- You might want to properly countersink the screws. With the soft spruce, I had a hard time doing this without cracking the wood.
- Use beech as more stable wood. This will be a lot harder to work with though!